


Hey! This is my first real tutorial, so dont get mad if its not good and stuff.
Anyways, im gonna show you how to make a ghost/ghost effect in Gimp. Your outcome should look similar to these:

Im going to be showing you how to make the first one. Now, lets begin!
You need to find a scary background. Or not! You can use a picture of inside your house, or whatever you want! Your also going to need a picture of a person. You could just google "Little Girl" or "old man". Thats what I did. These are what I used.


Save your pictures, and open them both up in GIMP. Make sure there opened in two different windows

Now, on the image your using as your Ghost, Right click, Edit>Copy Visible. Now open a new document. Keep the sizes it gives you and make sure you make it transparent. Now, go to Edit>Paste and paste your "Ghost" into it. Zoom in a bit and start erasing the background of the picture (if there is one). You dont have to be perfect, you can erase over the edge of the person, it really doesnt matter. But make sure it still looks good.

When your done, click the Smudge tool and smudge around the edges.

Now copy it (Edit>Copy Visible).Make a new layer in the Background image. Now , on your background layer, if its kind of light, and not dark enough, get the brush tool, set the Opacity to 50% and make the brush big and just go over the background. Now paste your "Ghost" into your Background picture. Dont close your "Ghost" picture, just in case you mess up or something. Merge the pasted layer down to one layer. So now you have two layers, the Background and the Ghost.

Now, make sure your still on the Ghost layer. Go to Colors>Components>Channel Mixer.

Leave all the sliders alone. But make sure that the "Monochrome" box is checked, and hit OK.

Now, set the Ghost layer to Hard Light, Opacity at 60%.

Then on the Ghost Layer, go to the layers menu (Ctrl+L) right click it, and click "Add Layer Mask". Go to your brush tool, set the opacity 50% and go over the Ghost. (Sorry, i didnt get a screenshot for this part )
)
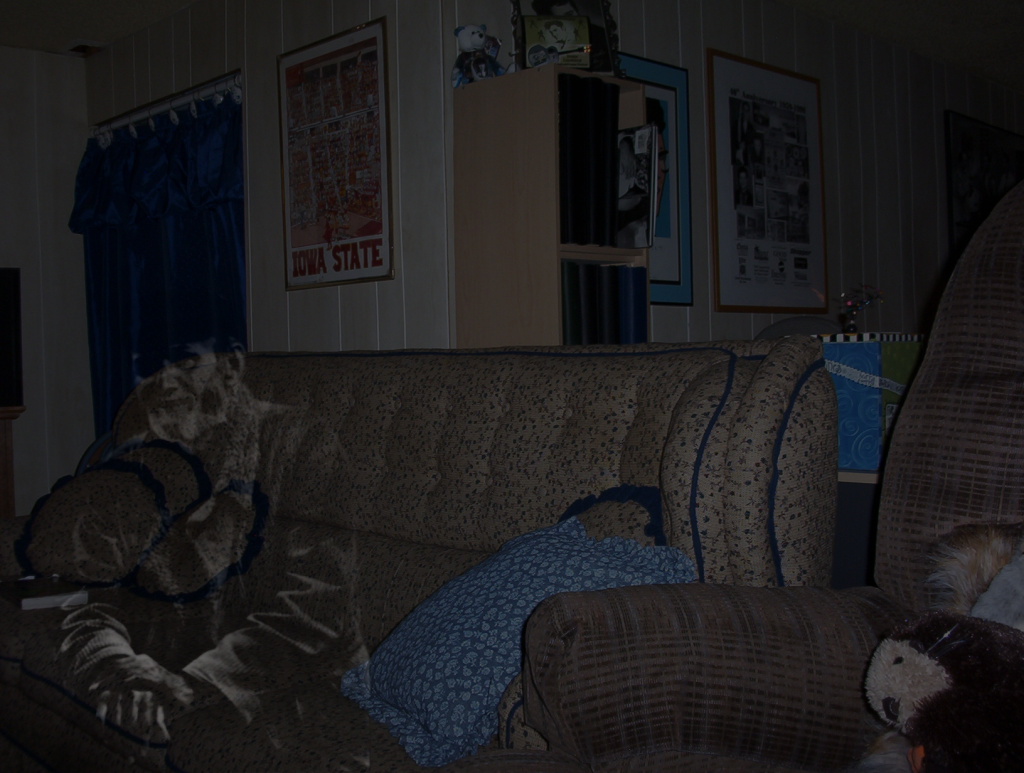
And then your done! But, on the step where you change the Ghost layer to Hard Light, you can pick a different one. It depends on how you want it to look. I hope you enjoyed this tutorial... and id like to see what you all make!
Anyways, im gonna show you how to make a ghost/ghost effect in Gimp. Your outcome should look similar to these:
Im going to be showing you how to make the first one. Now, lets begin!
You need to find a scary background. Or not! You can use a picture of inside your house, or whatever you want! Your also going to need a picture of a person. You could just google "Little Girl" or "old man". Thats what I did. These are what I used.
Save your pictures, and open them both up in GIMP. Make sure there opened in two different windows
Now, on the image your using as your Ghost, Right click, Edit>Copy Visible. Now open a new document. Keep the sizes it gives you and make sure you make it transparent. Now, go to Edit>Paste and paste your "Ghost" into it. Zoom in a bit and start erasing the background of the picture (if there is one). You dont have to be perfect, you can erase over the edge of the person, it really doesnt matter. But make sure it still looks good.
When your done, click the Smudge tool and smudge around the edges.
Now copy it (Edit>Copy Visible).Make a new layer in the Background image. Now , on your background layer, if its kind of light, and not dark enough, get the brush tool, set the Opacity to 50% and make the brush big and just go over the background. Now paste your "Ghost" into your Background picture. Dont close your "Ghost" picture, just in case you mess up or something. Merge the pasted layer down to one layer. So now you have two layers, the Background and the Ghost.
Now, make sure your still on the Ghost layer. Go to Colors>Components>Channel Mixer.
Leave all the sliders alone. But make sure that the "Monochrome" box is checked, and hit OK.
Now, set the Ghost layer to Hard Light, Opacity at 60%.
Then on the Ghost Layer, go to the layers menu (Ctrl+L) right click it, and click "Add Layer Mask". Go to your brush tool, set the opacity 50% and go over the Ghost. (Sorry, i didnt get a screenshot for this part
And then your done! But, on the step where you change the Ghost layer to Hard Light, you can pick a different one. It depends on how you want it to look. I hope you enjoyed this tutorial... and id like to see what you all make!